
Suppose you are developing a user interface, and you support it with your code. Your user is uploading a document, and your code needs to wait for the time the file is being uploaded. Also, when you visit a complex having automated doors, you must have noticed that while you are entering the complex, the door stands still. Only when you have entered the complex, the door closes automatically. What is causing the delay in both situations?
Codes support both systems discussed above. It is the time delay function of programming languages that is causing the required time delay. We can also add time delays in our Python codes. The time module of Python allows us to establish delay commands between two statements. There are numerous ways to add a time delay and, in this article, we will discuss each method step-by-step.
Python’s time.sleep() – Pause, Stop, Wait or Sleep your Python Code
Python's time module has a handy function called sleep(). Essentially, as the name implies, it pauses your Python program. The time.sleep()command is the equivalent to the Bash shell's sleep command. Almost all programming languages have this feature.
The time.sleep() function
While using this function, we can specify the delay, and the compiler will execute the fixed time delay. The syntax of this function is as follows:
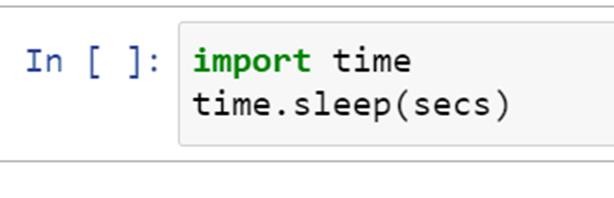
time.sleep() Arguments
- secs - The number of seconds the Python program should pause execution. This argument should be either an int or float.
Using Python's time.sleep()
Here's a quick, simple example of the syntax:
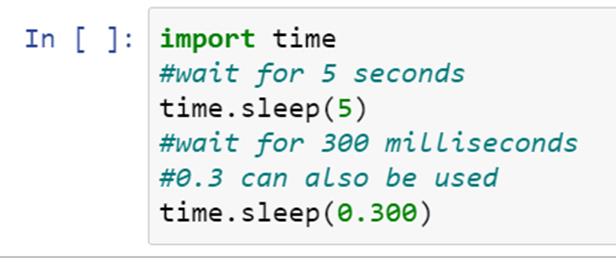
Here we have instructed the system to wait for five seconds through the first command and then wait for three hundred milliseconds, which equals 0.3 seconds. You can note here that we have written the value of the time delay inside the bracket based on the syntax.
Now let us consider another example to execute time delay.

Here we have taken a variable 'a' whose value we have stored as five. Now we are printing the value 'a' and then again printing an increased value of 'a'. However, there is a time delay between the execution of both statements. And, we have specified that using the time.sleep() function. You must have observed that we have also imported the time module at the beginning of the code.
Now let’s see what the output is:
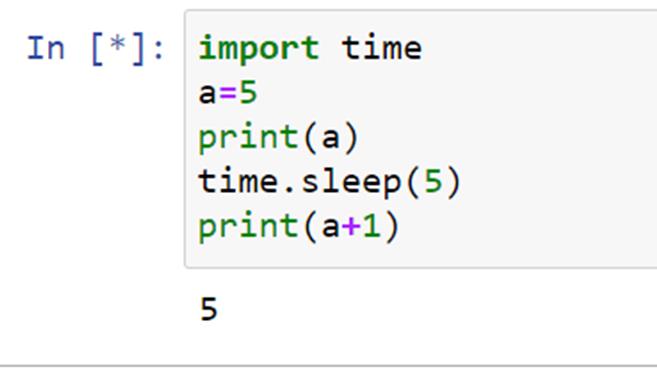
Here we can see that only the first command is executed. Now the output after five seconds:
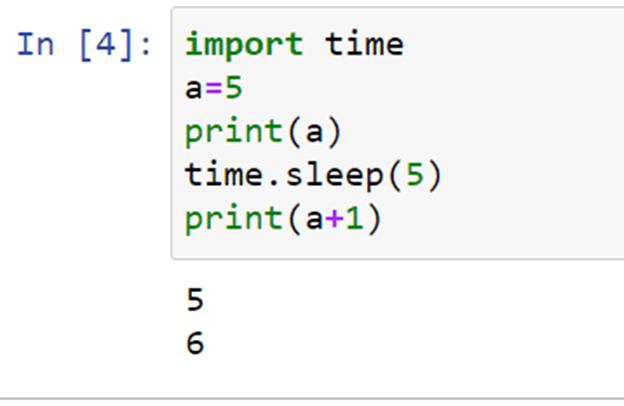
Now, after a delay of five seconds, the second statement is also executed.
Advanced syntax of the sleep() function
Here's a more advanced example. It takes user input and asks you how long you want to sleep(). It also proves how it works by printing out the timestamp before and after the time.sleep() call. Note that Python 2.x uses the raw_input() function to get user input, whereas Python 3.x uses the input() function. Now let us see the input syntax:
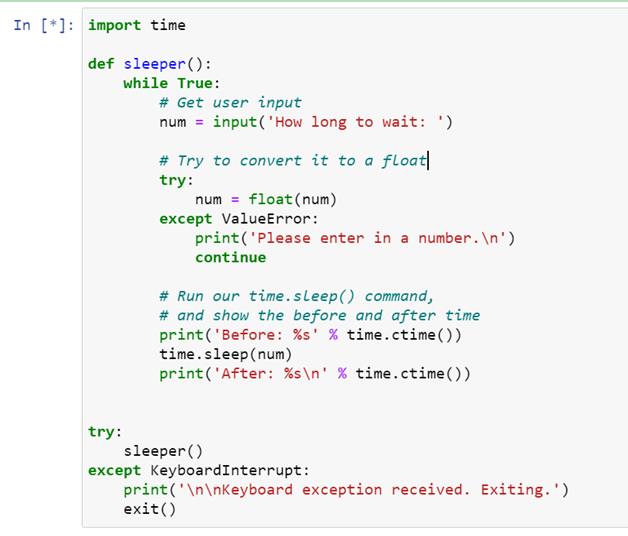
The code given above asks the user how long to wait. We have mentioned the command for this output in the sleeper() function. Then, the code prints the computer time at the beginning of the execution of code and after the implementation of code. This way, we get to see the actual functioning of the delay function. Now let's see the output:
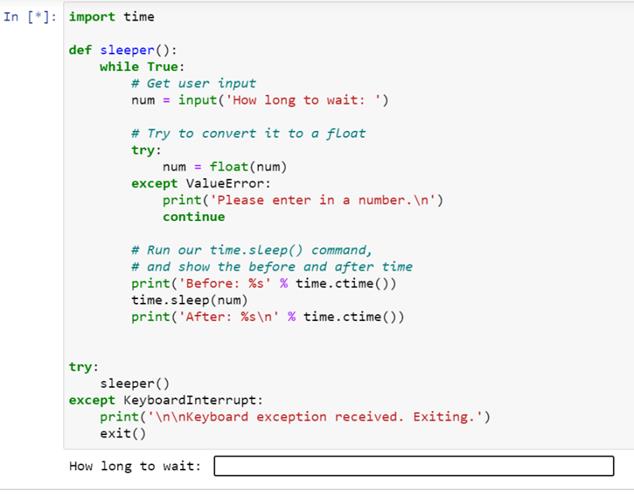
The system asks for our input, i.e., how long we want the system to wait. Let's enter 5 seconds and observe the final output.
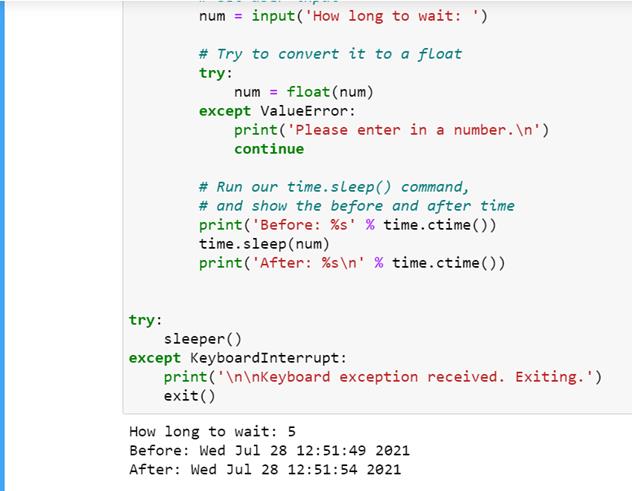
We can see that the starting computer time(“Before”) and ending computer time(“After”) have a time difference of five seconds.
The Accuracy of time.sleep()
The time.sleep() function uses the underlying operating system's sleep() function. Ultimately there are limitations of this function. For example, on a standard Windows installation, the smallest interval you may delay is 10 - 13 milliseconds. The Linux kernels tend to have a higher tick rate, where the intervals are generally closer to 1 millisecond. Note that in Linux, you can install the RT_PREEMPT patch set, which allows you to have a semi-realtime kernel. Using a real-time kernel will further increase the accuracy of the time.sleep() function. However, unless you want to sleep for a brief period, you can generally ignore this information.
Using Decorators To Add time.sleep() Command
Decorators are used for creating simple syntax for calling higher-order functions. When can we use decorators? Suppose we have to test a function again, or the user has to download a file again, or you have to check the status of an interface after a specific time interval. You require a time delay between the first attempt and the second attempt. Thus, you can use decorators in cases where you need to check repeatedly and require a time delay.
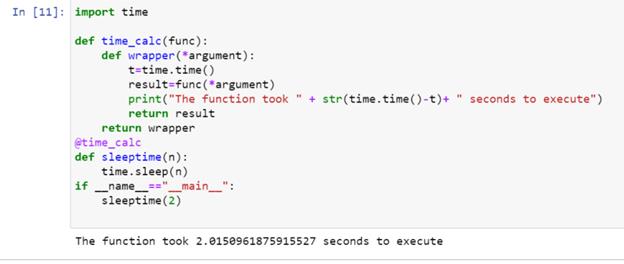
Let's consider an example using decorators. In this program, we will calculate the amount of time taken for the execution of the function.
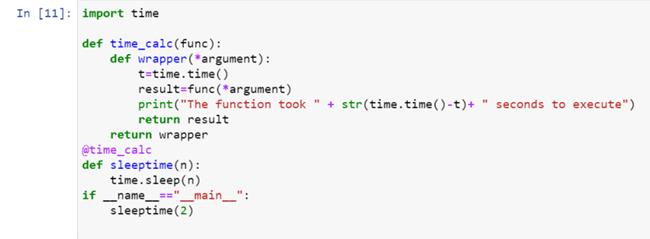
Here time_calc() is the decorator function extending and containing the other functions, thus providing a simple syntax. Let's see what we get as the output.
Using Threads To Add time.sleep() Command
Multiple-threading in Python is equivalent to running several programs simultaneously. When multi-threading is combined with the time module, we can solve complex problems quickly. Multi-threading functions are available from the threading module.
Let’s print the alphabet song using multi-threading and time delay.
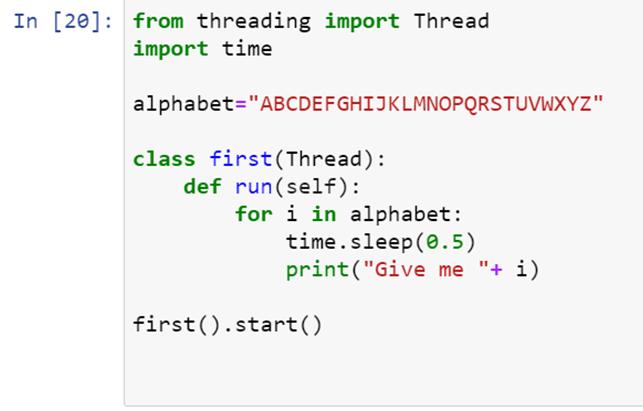
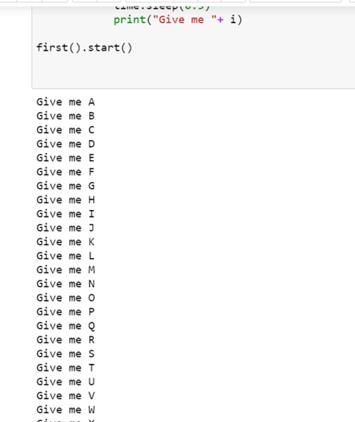
Here one thread is being used to print the individual alphabets. There is a time delay of 0.5 seconds as well. When you run the program, you will see that each line of the alphabet song is printed after a delay of 0.5 seconds. Let’s see what the output is:
Practice Problem For Time Delay
-
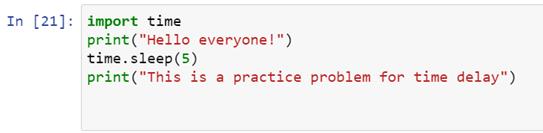
Printing two statements with a time delay:
In this problem, we will print two statements, the first one being “ Hello everyone! “
And the second one being " This is a practice problem for time delay." We will introduce a time delay of five seconds between these two statements. Let's see the syntax of the code for this problem:

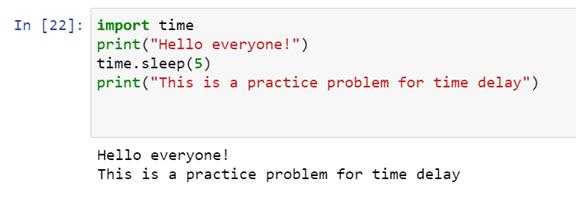
As you can see, the basic steps are straightforward. We first import the time module. Next, we give the print command for the first statement. We then introduce time delay through time.sleep() function, and then we give the command for printing the following statement. Let's see what the output is:

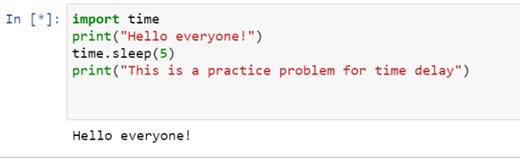
This image shows the first output.

Now, this output is obtained five seconds later than the previous output.
-
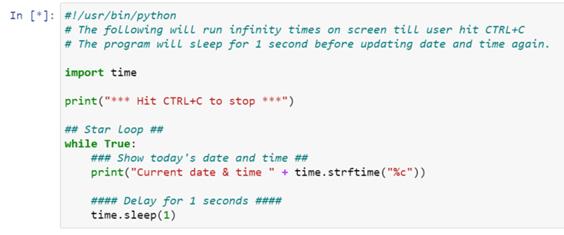
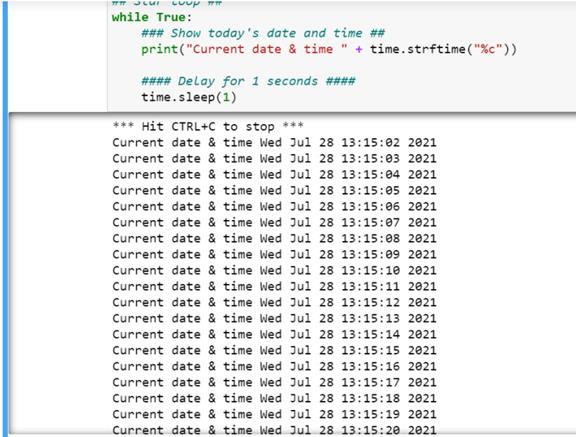
Program to display date and time :
Let's create a program where we make a digital clock that also displays the date.
The code for this task is as follows:

Here we have given the command to display the date and time. Then we have added a time delay of one second so that the time gets updated. The output for this program is as follows:

Conclusion
Time delay has immense application in user interfaces. It becomes essential for a programmer to know how she can add time delay in her program. We hope that this article helped you in learning about the time module of Python. Now you can add time delays in your code efficiently and increase the productivity of your code!